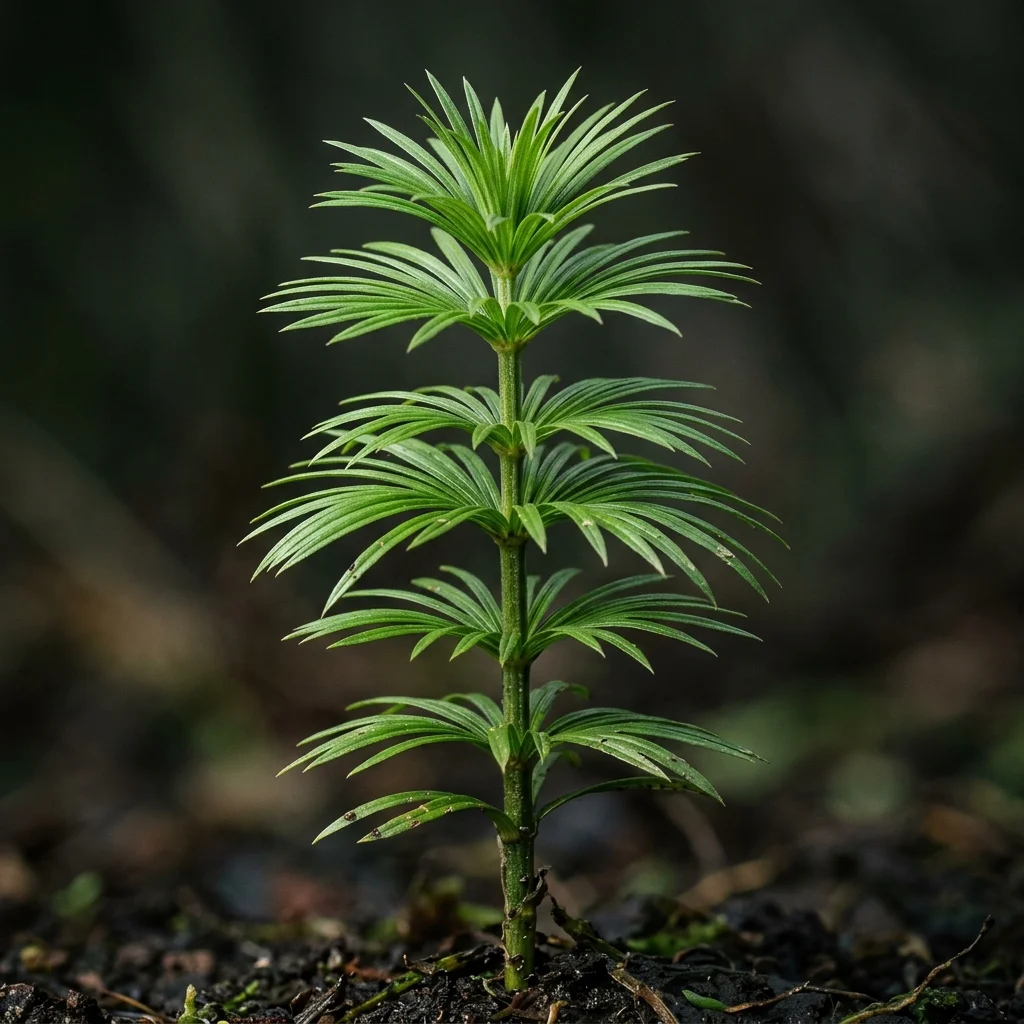
Carex muskingumensis

Palm Sedge Care & Identification Guide

Palm Sedge is an exceptionally unique, highly structural native North American wet-shade sedge, prized for its layered leaves arranged symmetrically along upright stalks, looking exactly like miniature green palm trees. It is the premier structural selection for damp shade and rain gardens.


Sunlight Icon
Sunlight Part Shade to Full Shade (highly shade-tolerant; can handle full sun in wet soils).
Watering Icon
Watering Moderate to high; prefers consistently damp or wet organic soils. Tolerates standing water.
Soil Mix Icon
Soil Mix Rich, moisture-retentive, organic-rich loam or heavy clay. Adaptable.
Temperature Icon
Temperature 15°C - 25°C
Toxicity Warning Icon
Toxicity Completely non-toxic and highly safe for all dogs, cats, and pets.
Botanical macro photography of Palm Sedge (Carex muskingumensis) - Plant AI care database

How to Identify Palm Sedge

Palm Sedge (Carex muskingumensis) is a remarkable botanical species widely appreciated for its unique aesthetic and structural appeal. Recognizing its definitive visual traits is key to distinguishing it from other similar plants.

  • Key Visual Features: Key Visual Features: Stiff, solid triangular or round vertical stems rising in graceful clumps directly from strong underground rhizomes.
  • Color Variations: Color Variations: Vivid emerald greens, chartreuse, rich bronze, or cream-striped blades depending on the potted cultivar.
  • Common Confusions: Common Confusions: Often mistaken for true ornamental grasses, but easily distinguished in pots by their solid stems and three-ranked foliage arrangement.
💡 Plant AI Tip: Not sure? Take a photo with Plant AI to identify your houseplants instantly.

Complete Care & Cultivation Guide

Follow our detailed scientific care guide to keep your Palm Sedge thriving and gorgeous all year round.

Thrives in consistently moist to wet soil, replicating their native wetland habitats. Unlike standard houseplants, potted sedges and rushes require high soil moisture. Water 2 to 3 times a week, ensuring the potting medium remains evenly saturated. Never let the pot dry out completely, and keep a shallow tray of water beneath the pot to maintain humidity.
Requires light grooming. Gently prune away yellowed or brown foliage blades at the soil level using sterile shears to maintain an elegant silhouette. Wipe the upright stems with a soft, damp microfiber cloth regularly to clear indoor dust and prevent scale build-up.
Feed sparingly. Apply a highly diluted liquid houseplant fertilizer once in mid-spring and mid-summer to promote steady green shoots. Avoid heavy nitrogen fertilizers, which can lead to weak, floppy foliage inside indoor rooms.
Thrives in bright, indirect light near an east-facing window, but adapts remarkably well to lower-light office corners. Shield from intense direct afternoon sunlight to prevent leaf tip scorch or waxy coat bleaching.
Requires a heavy organic potting mix with outstanding water-retention capacity. A superb recipe consists of 40% organic compost, 40% peat moss, and 20% coarse sand or perlite, keeping a slightly acidic to neutral pH of 5.5 to 7.0.
Easily propagate by dividing the dense root ball during spring repotting. Gently slice through the fibrous rhizomatous crown with a sterile knife, ensuring each section has healthy roots, and pot them immediately in saturated loam.
Thrives in standard cozy indoor temperatures between 15°C and 25°C. Keep away from chilly winter window panes or drafts, and ensure the room does not drop below 10°C to prevent cold tip die-back.
Select a wide, glazed ceramic pot with drainage holes to hold moisture. They prefer to stay slightly root-bound, but repot every 2 years to refresh the compacted, saturated organic potting soil.
Occasionally attracts spider mites or fungus gnats in stagnant indoor rooms. Mist the foliage to raise humidity and treat with mild insecticidal soap or neem oil if pests are spotted.
Susceptible to root rot if kept in completely stagnant water without any oxygen. Ensure the pot has proper bottom drainage holes, and periodically empty the drainage tray to prevent stagnant root suffocation.
Potted sedges make spectacular architectural features in modern living rooms. Placing them in groups with other houseplants creates a high-humidity microclimate that keeps all your indoor greens thriving.

Is your Palm Sedge leaves turning yellow, dry or brown?

Keep your indoor garden vibrant. Take a photo with Plant AI to diagnose pests and leaf spot diseases instantly.

Diagnose My Plant

Common Diseases & Treatment

Root Rot (Overwatering)

Symptoms: Leaves turn soft and yellow at the base, shrivel and drop prematurely, accompanied by a mushy root system and foul soil odor.

Action: Drastically cut watering. Remove mushy leaves, wash away old soggy soil, prune rotten black roots, and repot in dry succulent mix with drainage holes.

Foliage Rust

Symptoms: Small powdery orange or brown pustules appear on the linear leaves under humid, poorly ventilated indoor conditions.

Action: Isolate the plant, prune infected leaves, and spray with a copper-based organic fungicide. Improve indoor ventilation.

Frequently Asked Questions

Why is it called 'Palm Sedge'?

The common name comes from the highly unique, horizontal arrangement of its leaves along the upright, rigid stems. The leaves spread outward symmetrically from a central stalk in three directions, looking exactly like a miniature tropical palm tree.

Can Palm Sedge grow in standing water?

Yes! Carex muskingumensis is a native wetland plant that is highly adapted to seasonal floodplains. It can tolerate standing water up to 3 to 4 inches deep, making it a premier plant for shaded rain gardens and pond margins.

Does Palm Sedge spread invasively?

No. Palm Sedge is a slowly expanding clump-forming bunchgrass that grows outward from a tight central crown. It does not produce aggressive runners, making it highly reliable and safe for formal garden borders.

What happens to Palm Sedge in the winter?

Palm Sedge is deciduous. The foliage turns a beautiful golden-bronze in autumn, dries, and eventually breaks down in winter. Cut the entire plant back to about 2 inches in late winter or early spring before new growth starts.

No more dying plants. Grow healthy greens today!

Get Started for Free